Azure DevOps provides a suite of services for development and collaborations for your projects. Azure DevOps services include Azure Pipelines, which is a popular tool for Continuous Integration (CI) and Continuous Deployment (CD). It works with any language, any platform and runs jobs in parallel on Linux, macOS or Windows agents.
In this blog, I am going to demonstrate a way to create Azure Pipelines for Mule releases. I will also highlight the features used within Azure Pipelines that I have used to maximise efficiency and security.
When it comes to deploying Mule applications, there are two options: anypoint-cli or anypoint API. anypoint-cli is a good choice because it allows you to utilise one of Azure Pipeline's features to store anypoint credentials as a secure file, which can be used for multiple pipelines.
Mule Maven Plugin is a simplest way to deploy your applications and it is described as a way to build CI/CD pipelines in many other blogs. However, usage of Mule Maven Plugin should be avoided as this starts off the build process and generates the jar file every time you want to deploy. One of the fundamental principles of Continuous Delivery is Build Once, Deploy Anywhere. This blog outlines steps to create pipelines that build artifacts once and deploy them to multiple environments.
Prerequisites
To follow this guide, you will need:
- A working Mule application in a source code repository
- An Azure DevOps account
Setting up the Library
Setting up the Library is a good place to start. The Library is an ideal place to store reusable variables or files for your pipelines.
Variable groups
The following variable groups are used.
anypoint-url group contains static URLs for Anypoint's analytics, platform and core services.
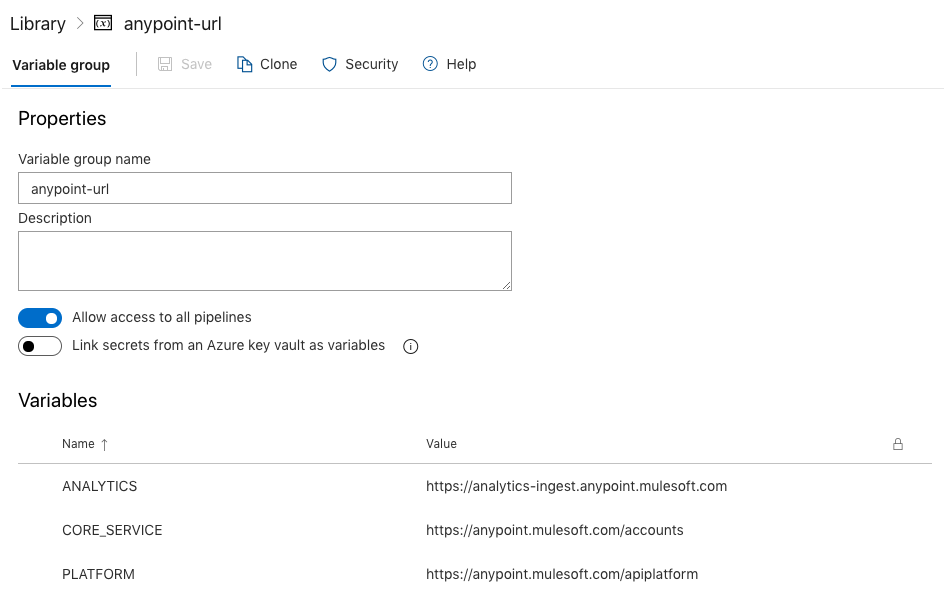
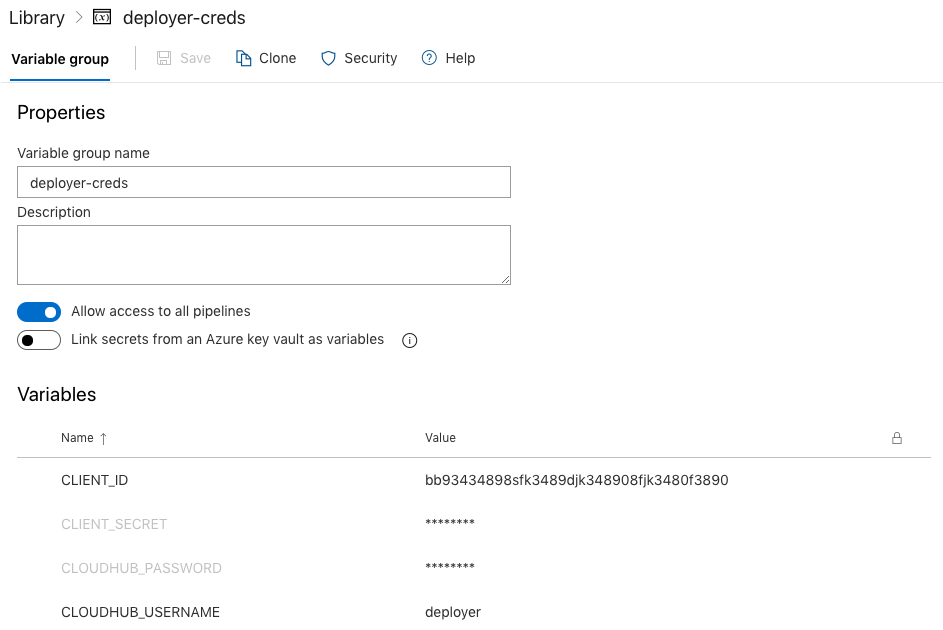
deployer-creds group contains credentials for the user account that has privileges to deploy to your target environment. It also contains organisation credentials to link the Mule runtime to an Anypoint organisation. Make sure to change variable types to secret for any sensitive information. This ensures that they cannot be viewed by anyone. If you have an Azure key vault, you can link secrets here. This is especially useful when sharing of the variables is required across projects.
Secure files
Secure files is a good place to store files that have sensitive information because they cannot be viewed after uploading them.

credentials file contains parameters for anypoint-cli which will be used for deployments later.
{
 "dev": {
  "username": "deployer",
  "password": "MyPassw0rd",
  "organization": "Deloitte",
  "environment": "dev",
  "host": ""
 },
 "test": {
  "username": "deployer",
  "password": "MyPassw0rd",
  "organization": "Deloitte",
  "environment": "test",
  "host": ""
 }
}
settings.xml is for Apache Maven. It contains credentials for the Mule Enterprise Edition repository as well as repository servers. This file is used by build pipelines.
Build Pipelines
To create a new pipeline, I need to have my source code in a repository. Azure DevOps can integrate with any Git-based repository including Azure Repos, BitBucket, GitHub or Subversion.
After I authorise Azure DevOps, it commits a new azure-pipelines.yml to the repository. This is a working YAML pipeline that is ready for customisation. I have set up my pipeline as below.
# Maven
# Build your Java project and run tests with Apache Maven.
# Add steps that analyze code, save build artifacts, deploy, and more:
# https://docs.microsoft.com/azure/devops/pipelines/languages/java

trigger:
- master

pool:
  vmImage: 'ubuntu-latest'

variables:
  MAVEN_CACHE_FOLDER: $(Pipeline.Workspace)/.m2/repository
  MAVEN_OPTS: '-Dmaven.repo.local=$(MAVEN_CACHE_FOLDER)'

steps:
- task: CacheBeta@0
  inputs:
    key: $(Build.SourcesDirectory)/pom.xml
    path: $(MAVEN_CACHE_FOLDER)
  displayName: Cache Maven local repo

- task: DownloadSecureFile@1
  displayName: Download secure file
  name: settings
  inputs:
    secureFile: 'settings.xml'

- task: Maven@3
  inputs:
    mavenPomFile: 'pom.xml'
    publishJUnitResults: true
    testResultsFiles: '**/surefire-reports/TEST-*.xml'
    mavenOptions: '-Xmx3072m'
    javaHomeOption: 'JDKVersion'
    jdkVersionOption: '1.8'
    jdkArchitectureOption: 'x64'
    goals: 'package -s $(settings.secureFilePath) $(MAVEN_OPTS)'

- task: PublishPipelineArtifact@1
  inputs:
    targetPath: $(System.DefaultWorkingDirectory)
    artifact: 'drop'
Let's explore the tasks in detail.
CacheBeta: CacheBeta is used to speed up the build process. During the build, Maven connects to many repositories to download dependencies. CacheBeta is used to so that Maven doesn't need to download the same dependencies each time. I was able to reduce the build time from 20 minutes to 2 minutes by using CacheBeta.
DownloadSecureFile: downloads the settings file that is used by Maven. It contains credentials for the Mule Enterprise Edition repository. By having settings.xml in Secure files, no Maven credentials are exposed in the source repository.
Maven: the mvn package command is used to generate the artifact. Notice the use of -s argument to specify the settings.xml file that was downloaded as a secure file.
I have also pushed the .artifactignore file to the repository. This is used when the artifact is created, and it reduces the size of the artifact file by excluding unnecessary files. For Mule deployments, you only need the .jar file.
**/*
!target/*.jar
Release Pipelines
Variables
In Pipeline variables, I have defined the variables that are used throughout the pipeline.
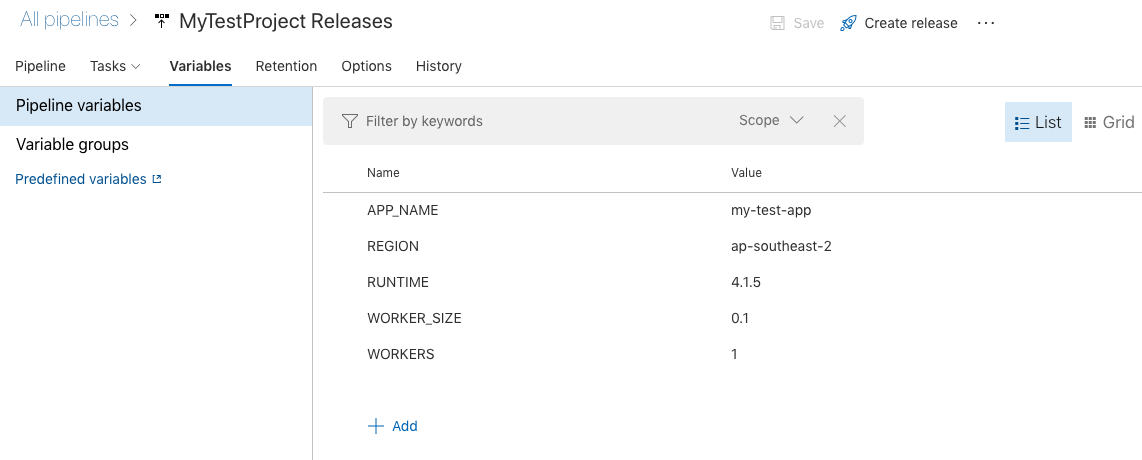
These variables are used in CloudHub deployments. Please note that the values such as RUNTIME or WORKER_SIZE could be different for each release.
For Variable groups, I linked the variable groups that I have created in the Library earlier.
Pipeline
Release pipelines have two components - Artifacts and Stages.
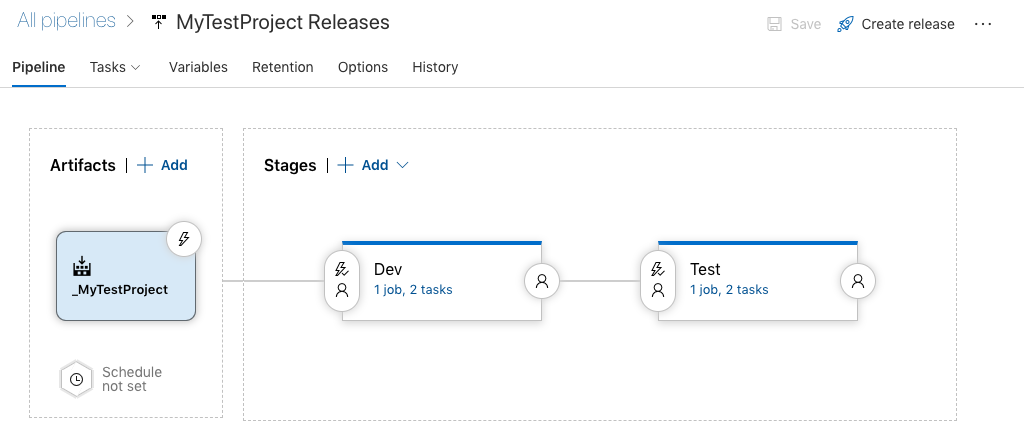
In Artifacts, I have specified the Pipeline Artifact that was published by the Build Pipeline. This is .jar package that was created by the mvn package command.
In Stages, I have created two stages - Dev and Test - each representing the corresponding CloudHub environment.
Pipeline Tasks
In the pipeline tasks, I have created an agent job with two tasks.
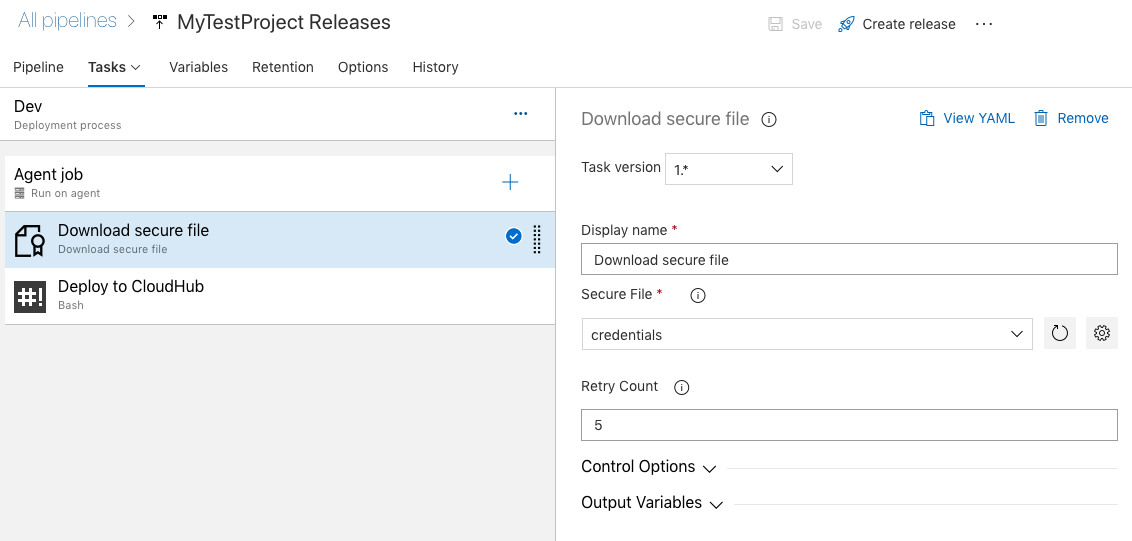
The first task downloads a secure file. This is the credentials file which contains credentials for connecting to CloudHub and its environments.
The bash task is responsible for deploying the application via anypoint-cli.
An agent with any Windows image has npm included. So I can install anypoint-cli straight away.
sudo npm install -g anypoint-cli@latest
mkdir ~/.anypoint
cp $AGENT_TEMPDIRECTORY/credentials ~/.anypoint/
Then I set the target environment.
export ANYPOINT_PROFILE="dev"
After locating the artifact file under $(Release.PrimaryArtifactSourceAlias)/drop/target, I can deploy it using the anypoint-cli command.
anypoint-cli runtime-mgr cloudhub-application deploy
--runtime "$(RUNTIME)" --workers "$(WORKERS)" --workerSize "$(WORKER_SIZE)" --region "$(REGION)"
--property "env:dev"
--property "anypoint.platform.platform_base_uri:$(PLATFORM)"
--property "anypoint.platform.coreservice_base_uri:$(CORE_SERVICE)"
--property "anypoint.platform.analytics_base_uri:$(ANALYTICS)"
--property "anypoint.platform.client_id:$(CLIENT_ID)" --property "anypoint.platform.client_secret:$(CLIENT_SECRET)"
$(APP_NAME) $filename
That's it! Now my Mule application is deployed to the CloudHub platform. Tasks in Test stage are essentially the same as Dev, except for changing the environment variable to "test".
Wrap Up
In this blog post, I have outlined the steps to deploy Mule application with Azure Pipelines. The pipeline re-uses the same artifact that was created during the build phase for every release. Variables are used so that you can specify different options for each release without modifying the pipeline. This is an efficient pipeline that reduces build time with cache and build size with artifact ignore. It is also secure as sensitive information is hidden as secrets or secure files. From here, you can add further customisations and enhancements to create a pipeline that is suitable for your needs.
